
The Play Editor Tool helps you create custom drawings by utilizing pre-designed layouts and field backgrounds. Create new files within your existing folder structure and add drawing stencils for efficient assembly.
Leverage our Play Editor Drawing stencils to quickly mesh different pieces of play diagrams into one.
Drawings Offered
Drawings are stored at PowerPoint files. As a part of the Play Editor Tool, we provide the following Drawing files:
- Offensive Personnel Groups
- Offensive Formations
- Defensive Personnel Groups
- Coverage Diagrams
- Special Teams - Tight View
- Special Teams - Full Field
- Field Backgrounds
Build a Diagram with the Play Editor Drawings
- Open PowerPoint
- Turn your Pro Quick Draw toggle panel on by selecting the PQD Clock icon in the home tab
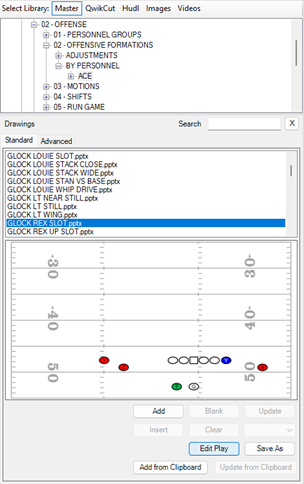
- Pick the play from your Master Library that you wish to work with
- Select Edit to make changes to the file you’ve selected or Save As to duplicate the file you’ve selected
- If you chose Save As, rename the new file and hit Save
Turn on the Play Editor on in the top right-hand corner of the home tab.
Select the Drawings tab in the Play Editor
Select the orientation (offense vs defense) Your file will be imported in as Vertical or Horizontal.

Single click the drawing stencil and select Add, or double click to insert.

Adding a Drawing to Your Library
Select the Gear Icon in the top right corner of the Play Editor Menu to open the Play Editor Settings. Click on the Manage Drawing Libraries Section to add a file into the Drawing Library.
Click the Add Drawing Library button
Click the three dots. That will open the Select Files window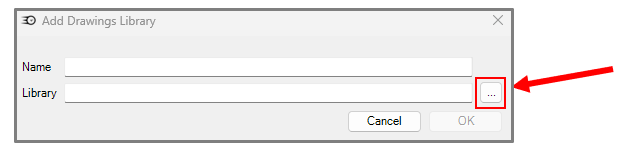
Search your folders for the desired file(s), click Open, click OK in the Add Drawing Library window, and click OK in the Play Editor Settings window
Play Editor Drawings will reload, and your file(s) will now be shown in your library
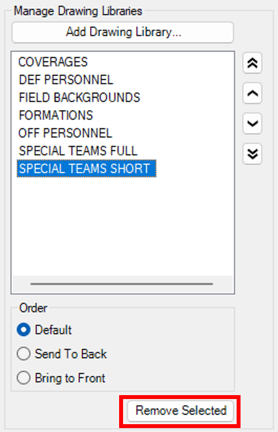
Removing a File from the Play Editor Drawings Library
Select the Gear Icon in the top right corner of the Play Editor Menu to open the Play Editor Settings.
-
- Select the file(s) to be removed
- Click the Remove Selected button, then click OK
- Play Editor drawings will reload, and your file will no longer be available in the Library
Ready to add shapes to your diagram? Learn how to use the Play Editor Shapes.