
If you've just requested a trial or setting up license for the very first time, follow these steps to get started.
Step 1: Create Your Account
- After you've requested a trial or purchased a license for the first time, you will be given a registration code via email and prompted to create a Pro Quick Draw account.
- The registration code was sent to the email you requested the trial with.
- Using those credentials you just created, login to your Account Portal
- Select 'Resend Activation Code' if need be.
You will receive code within minutes. Didn't receive? Check spam folder or refresh.
High filtered / high security email addresses my have a hard time receiving email.
Please email us if you require assistance.
Step 2: Download Pro Quick Draw
- Once logged into the Account Portal, select Download Pro Quick Draw from the Downloads tab

⚠️ If your team network or anti-virus software is blocking downloads, please contact your IT solutions or school administrator.
Step 3: Install Pro Quick Draw
- In the Downloads Folder of your PC, select ‘ProQuickDraw.exe’ to install the software


Step 4: Activate Your License
- After successfully downloading PQD, open Microsoft Powerpoint
- Open a Blank Presentation (or a Blank Drawing in Visio)
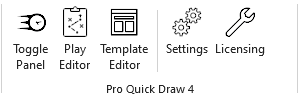
- On the PQD Home toolbar, select the Licensing Button (wrench icon)

4. Enter the username and password you created in the customer portal

- Select Activate
Installing Pro Quick Draw on multiple machines?
Step 5: Turn on Pro Quick Draw
- On the home tab of the PowerPoint ribbon, click the Toggle Panel button on
- Select the Toggle Panel to show/hide Pro Quick Draw
⚠️ Not seeing Pro Quick Draw in your PowerPoint ribbon?